Ronchi
Testing
A Ronchi screen is a piece of glass or plastic that has parallel lines on it. In the shop I use 85 lines per inch, and on an eyepiece for testing telescopes I like 130 lines per inch. At Chabot observatory’s Telescope Making Workshop they use 1000 line per inch gratings, which is far better for precision telescope making. However, with large, fast mirrors, this would be extremely difficult due to the high number of bars and their curves. Let’s talk about the eyepiece Ronchi first.
When the Paraboloidal mirror focuses a flat wave-front of light from an infinite point source, the reflection wave-front is spherical with the telescope’s focus at the center of curvature of that wave-front. The spheres coming in to the focus are exactly like the spheres going away after it has passed through the focus. Therefore the wave-front would be exactly the same inside and outside of focus if there were no spherical aberrations. With a Ronchi screen this would be the illusion of straight and parallel lines, or bars, filling the mirror from your viewpoint. Anything else would be an aberration of these incoming and outgoing spheres. At the edge the bars would run off of the mirror without turning or hooking. If they do turn or hook [outward when outside focus, inward when inside focus], then this would be indicative of a turned down edge [TDE] or a rolled edge, depending on if it were right at the edge [TDE] or rolling from within the mirror’s interior. If the mirror was under-corrected, then the bars wouldn’t be straight. Inside of focus they would appear bent with their concaving toward the edge of the mirror, and outside of focus they would appear bent with the concavity pointing toward the center of the mirror. If there are zones, then as you move the star image across the field of view slightly, the bars would move across the face of the mirror and you’d see concentric defects in the bars in a particular zone. Furthermore, the atmosphere can make the bars not straight. If the bars are not straight but do NOT move at all during a large period of time, it is most likely in the mirror. If the bars are not straight and move, change shape, etc. during a period of time, then it may be air currents that are making them not straight. And of course, there may be a combination of both offenders.
In the shop, the Ronchi test works the same but we have to interpret things differently a bit. When the mirror is still spherical, then a perfect test would show straight bars edge to edge inside and outside of focus [at ROC] with no difference. There would be no hooking at the edge or near the edge. But when we have parabolized the mirror, then inside of the ROC the bars are bent with their concavity pointing toward the center of the mirror, and outside of the ROC they are bent with the concavity pointing toward the edge of the mirror. In fact, when the mirror is large and fast enough, they will bend so far that they will enclose to form complete ovals, closing in like two owl eyes. For this reason I do not like to evaluate the mirror quantitatively using Ronchi tests, although some very skilled telescope makers do. Click Here to see what is probably the best Ronchi quantitative analysis page I’ve seen, written by mirror master Mel Bartels. The idea is to run a program that makes an artificial Ronchi image, such and Ron Win. Then compare your mirror’s Ronchi images to that of the theoretically correct image.
To set up the standard Ronchi test, replace the knife on your test jig with a large enough Ronchi screen so that it covers the LED and protrudes high enough to be looked through [or photographed through]. Examine the mirror inside and outside of the ROC so that there are about 5 or 6 bars. Nearly instantaneous information can be yielded from this procedure to determine the next act of correction. If you move the Ronchi transversally while looking through it, you may be able to more easily detect zoniness that otherwise might be missed if static.
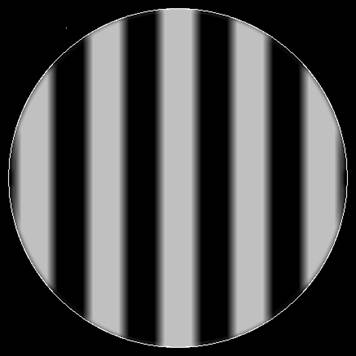
Ronchi of a sphere either inside or outside ROC in shop, Ronchi with TDE outside ROC.
or a paraboloid either inside or outside focus on star.
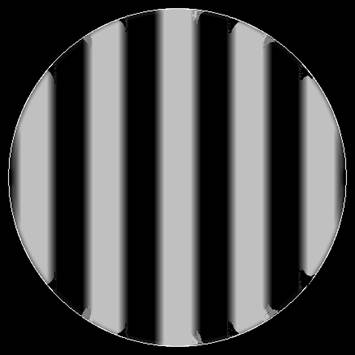
Ronchi of paraboloid outside ROC in shop.
The above mirror is shown with an 85 line per inch Ronchi grating outside ROC. It has a rolled edge and TDE. It also has anti-correcting in the body of the mirror. Since we are outside ROC the curves for a paraboloid ought to be concave outward, but these are concave inward. Two defects, anti-correction and rolled outer zone, were corrected. The TDE will be ground off near the end of the mirror making project. This is a 10” f/6.1.
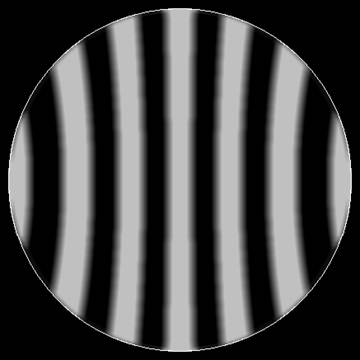
Here are some photos of a 24” f/3.6 being polished toward a sphere.
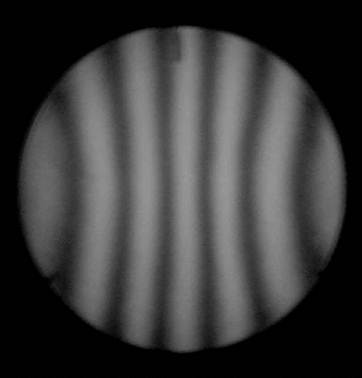
If the mirror were parabolized, a slower optic, and this image was outside the Radius of Curvature, it would be a fairly pretty mirror. However, this is a really fast mirror and we are inside the ROC. This implies that the mirror is anti-corrected, and a parabolizing stroke will bring it back towards a sphere.
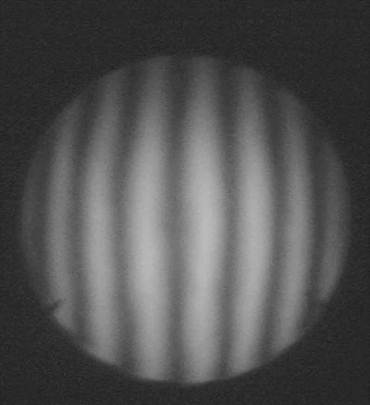
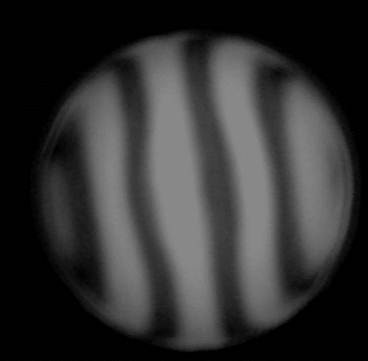
Here is the same mirror with the Ronchi grating outside of the ROC. Again it shows anti-correction. In both images the edge is fairly good. You can see diffraction contamination as the bars pass off the edge of the mirror.

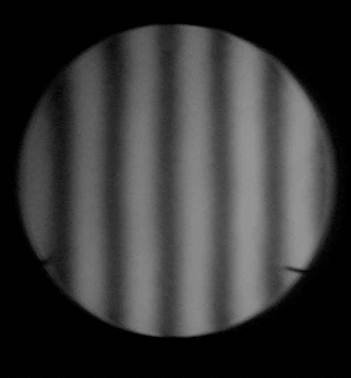
Above are two images of the same mirror after 4 hours of parabolizing strokes and other corrective work. The first image is inside ROC and the second image is outside ROC. It is important to know that unless the mirror has spherical aberration, the inside and outside images should have the same illusion, straight bars up and down. You can change the number of bars by moving toward or away from the ROC.
The mirror will now be parabolized and the bars will become curved again. This time they will bend concave toward the center when viewed inside ROC, and the bars will bend concave toward the edge when viewed outside ROC.
You can see astigmatism in the mirror/stand system. When you get close to ROC the bars will take on a long S shape, like an integral sign. Do not continue working the mirror as though nothing were wrong. You must correct the astigmatism.
I often perform autocollimation testing with Ronchi screens. If you have a paraboloidal mirror, and it’s in the scope with the secondary mirror and focuser, you can look directly at an optical flat. Imagine an L.E.D. passing through a Ronchi screen beam-splitter at your eyepiece location, shining into your secondary mirror, onto your primary mirror, out onto an aluminized optical flat, and returning exactly back through the scope to the beam-splitter, and passing through the Ronchi grating again and into your eye. If the optics were perfect, the bars would be straight both inside and outside of focus. Since this is a “double pass” test, it is twice as sensitive, there errors appear twice as large, so when you correct it so there are no visible errors, it is twice as accurate as a single pass test, such as on a star. I like this test because you can quickly pop back and forth between being inside focus and being outside focus. If there is the slightest amount of non-correction, say under-correction, then the bars, which look straight when you just look at them, will pop back and forth between being concave inward and being concave outward. It will be slight, but you can see it very well when you alternate quickly. This can be used to test your mirror to very exacting parabolization. You can do this at the focus of the telescope on a star as well.